|
|
| Monitor page for changes |
by ChangeDetection |

|
|
|
||||||

|
This page will take a while to load due to the large number of images. For now I cover the following Winboard interaces. More will be added, if time permits or on requests.
 Winboard is
where it all began. While other newer interfaces , are more user-friendly, Winboard still remains
the interface of choice for many people to run engine matches, due to the fact that it is rock
solid. Because almost all winboard engine authors use Winboard to test their engines for bugs,
it's the only interface that is most certain to run properly.
|
| FIGURE 1.1 |
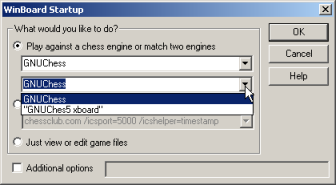
Step 1: Run Winboard.exe once, you will see 2 options Gnuchess and GNUChes5 Xboard for the first engine
and a similar choice for the second engine. See Figure 1.1 (left) . To add more options to the dialog box
follow the rest of the steps below.

|
| FIGURE 1.2 |
Step 2 : Exit Winboard. Browse to your Winboard directory and then open the file Winboard.ini with notepad (or any other text editor) by doubleclicking on it. See Figure 1.2 (right)

|
| FIGURE 1.3 |
Step 3 : In notepad, scroll down until you see the portion relating to chess engines.
See Figure 1.3 (Left).
|
| FIGURE 1.4 |
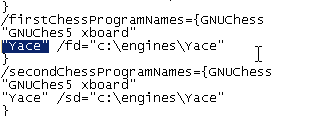
Step 5 The line after /fd=" refers to the directory where Yace.exe resides. The quotation marks are not strictly needed but won't hurt. They are necessary if the path or the exe file has a space in them (E.g c:\program files\Yace). Similarly, to add Yace to the list of options for the second engine, you do exactly the same, except that instead of fd/= you add /sd=" as shown in Figure 1.4. Save the file and restart Winboard.
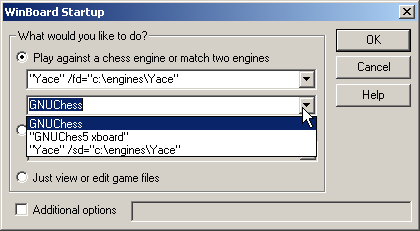
Step 6 You can now select Yace in the dialog box now. See Figure 1.5 (below)
|
| FIGURE 1.5 |
 Arena is a free interface by Martin
Blume that supports Winboard and UCI engines. Arena supports a
whole host of features including support for ICS, auto232player
and automated tourneys. Arena is constantly being updated, so some of the screenshots below might be slightly
different if you are using a different version (this guide is based on 1.0).
|
| FIGURE 2.1 |
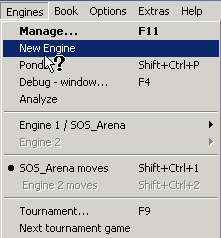
Step 1: Select New engine in the
Engines pull down menu
See figure 2.1 (left).
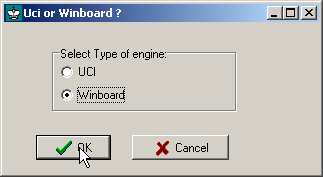
Step 2: This will open the UCI or Winboard?
engines dialog box window. This will give you a choice to choose between setting up a Winboard or UCI
engine. See figure 2.2 (below). Yace works in both modes,
but since this article is about setting up Winboard engines, select
Winboard.
|
| FIGURE 2.2 |
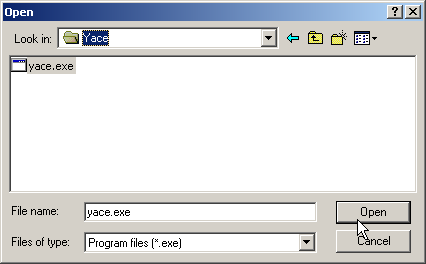
Step 3:
The windows explorer will then be automatically
opened and you should browse and select Yace.exe which lies in
the directory c:\engines\Yace. Click open. See figure
2.4(below).
|
| FIGURE 2.3 |
|
| FIGURE 2.4 |
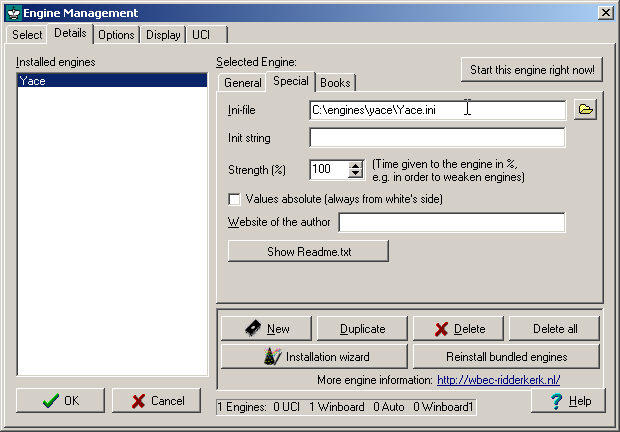
Step 5 Options continued : Click on the Special tab for more options, see
Figure 2.5 (below)
The ini-file field actually
refers to the name of the configuration file of the chess engine,
As explained before this file need not neccessarily have a
ini.extension. In this case though it does. Change the value in
the Ini-file to c:\engines\Yace\Yace.ini (if it isn't already); This isn't strictly
necessary, but can be very useful as we shall see.The
init string field can be left blank unless you need to add
some additonal parimeter like -xboard or send the OPL number for Chessmaster. You can also change other options
like adding a GUI book, in the Books tab. Consult the Arena FAQ for more details.
Click the Ok button and we are done.
|
| FIGURE 2.5 |
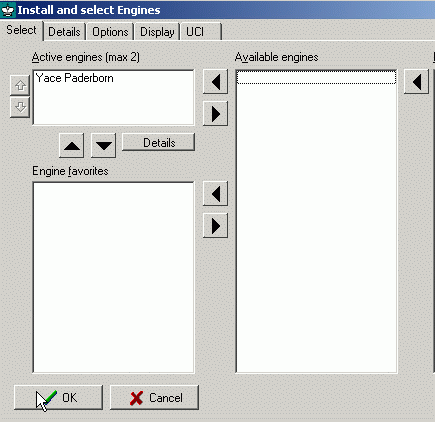
Step 6 : Click on the select tab, highlight
Yace
Paderborn in the available engines window, click on the
arrow to tranfer it into the Active engines (max 2)
window. If you have more than 1 engine setup, you can add another
active engine.Now click on Okay. See figure 2.6 (below)
|
| FIGURE 2.6 |
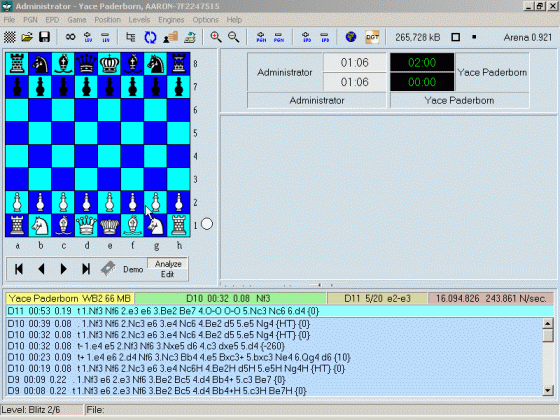
Step 7 : Wait for the engine to load up.Then click on the
analysis button for Yace to start the analysis. The VCR controls
below the board, allow you to move forward or backwards in any
game. If you wish to make moves not in the game, click on the
edit button. See figure 2.7 ( below).
|
| FIGURE 2.7 |
|
| FIGURE 2.8 |
|
| FIGURE 2.8 |
![]() Scid is a excellent free database by Shane Hudson.
Scid also has excellent support for Winboard engines. SCID 3.4
comes packaged with Scidlet, a winboard engine by Shane Hudson,
however you might still wish to import stronger Winboard engines
like Yace into SCID to aid analysis of games. You can download
Scid here. I would advise that if you have a version older than
Scid 3.4 to download a newer version, because winboard engine compatiability has improved
for newer versions.
Scid is a excellent free database by Shane Hudson.
Scid also has excellent support for Winboard engines. SCID 3.4
comes packaged with Scidlet, a winboard engine by Shane Hudson,
however you might still wish to import stronger Winboard engines
like Yace into SCID to aid analysis of games. You can download
Scid here. I would advise that if you have a version older than
Scid 3.4 to download a newer version, because winboard engine compatiability has improved
for newer versions.
Scid like most interfaces allows you to setup and run up to 2
winboard engines at the same time. For this example, we will be
setting up the first analysis engine
.
|
| FIGURE 3.1 |
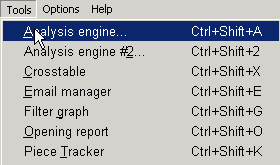
Step 1 : Select Tools , analysis engine.
This pulls up the Analysis Engine List. (See figure 3.1) .
Scid can use up to 2 engines at a time so you select
analysis engine #2 for the other engine.
|
| FIGURE 3.2 |

|
| FIGURE 3.3 |
|
| FIGURE 3.4 |
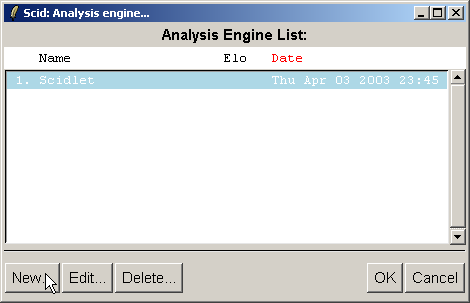
Step 4: Now access the engines analysis list, by repeating
step 1 above. The engines analysis list window should be similar
to in figure 3.2 except that now Yace appears as an
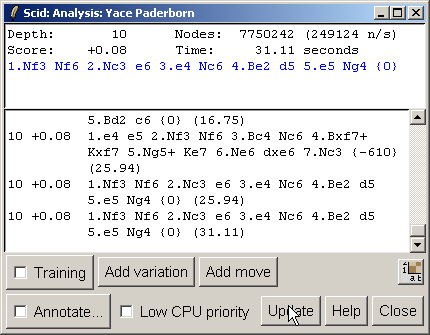
option.Highlight it, then click the OK button.This should call up
the Analysis Window. (Figure 3.4). The image below shows
Yace analysing the starting position of a game. As you go
forward, Yace will continue to analyse the position on the board.
For some engines, analysis does not appear immediately, and you
may need to go forward one move or click the update button. If
you wish to play a training game from the given position against
the engine, click on Training then select time per move
for the engine.

|
| FIGURE 4.1 |
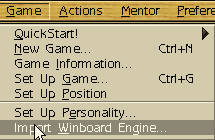
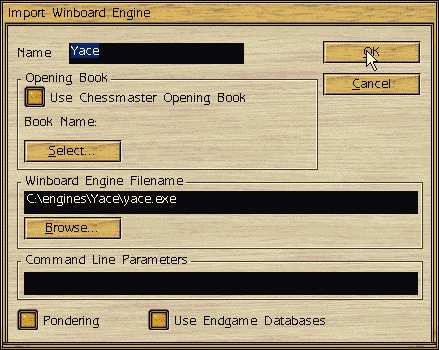
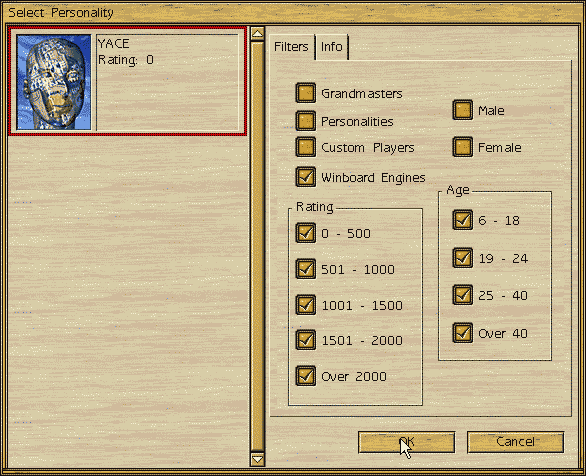
Step 1 : Select Game and then Import Winboard
engine in the pull down menu. See figure 4.1 (left).
 |
| FIGURE 4.2 |
|
| FIGURE 4.3 |
 |
| FIGURE 4.4 |
1. As of March 2003, other strong freeware engines include List
(Chessbase only), Rebel 12 demo (properity) ,Anacondan (CB
only)
2. A few rare Winboard engines like Mad,lampchop or Phalanx,
actually do not have configuration files. The latter 2 allows you
to configure the engine by sending command line options.